In order to highlight your extras with their categories we will have to take a total of 4 steps:
Create the categories with their properties.
Assign the extras to a category.
Choose the extras for your boat trips or activities.
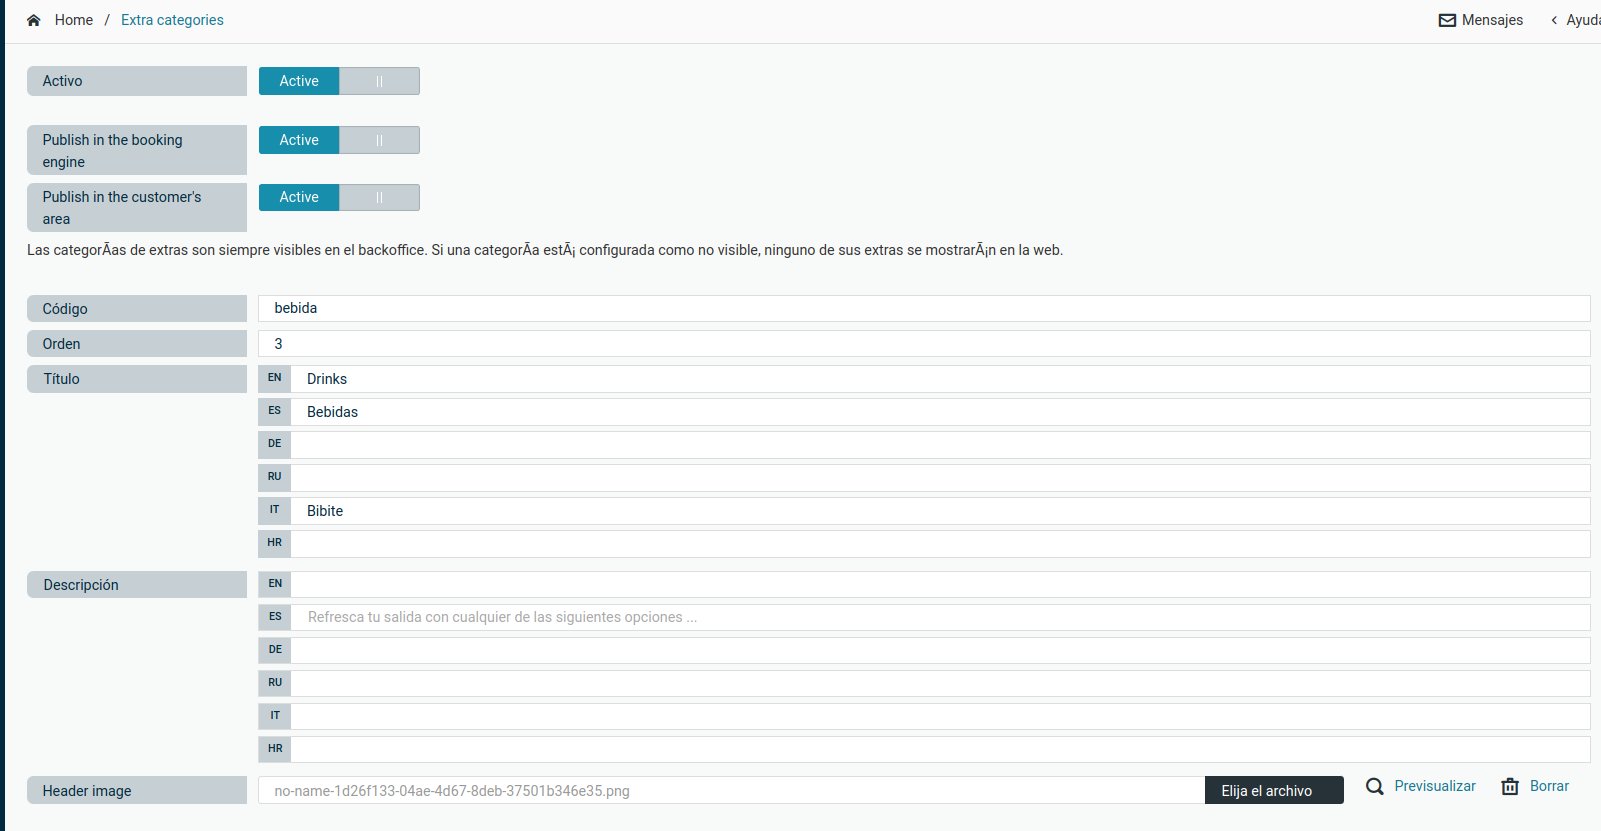
First, go to Catalogue > Content > Extras Categories and click on "Create New".
For the category to be visible you need to click on the first field "Active". You can then decide whether you want the category to be visible in the booking process, and in the customer area in the next two fields.
The category code is its identifier and the field you will see when you want to assign a particular extra to a certain category, make sure it is self-explanatory.
The order is a numeric field, which will allow you to configure the vertical order as you wish. The lower the value, the higher the category.
The title is what visitors will see for each category, in each language.
The description is a short explanatory support drop down.
The Header Image field allows you to upload a background image for each category. The recommended size is as follows:
Width: 1035px
Height: 209px

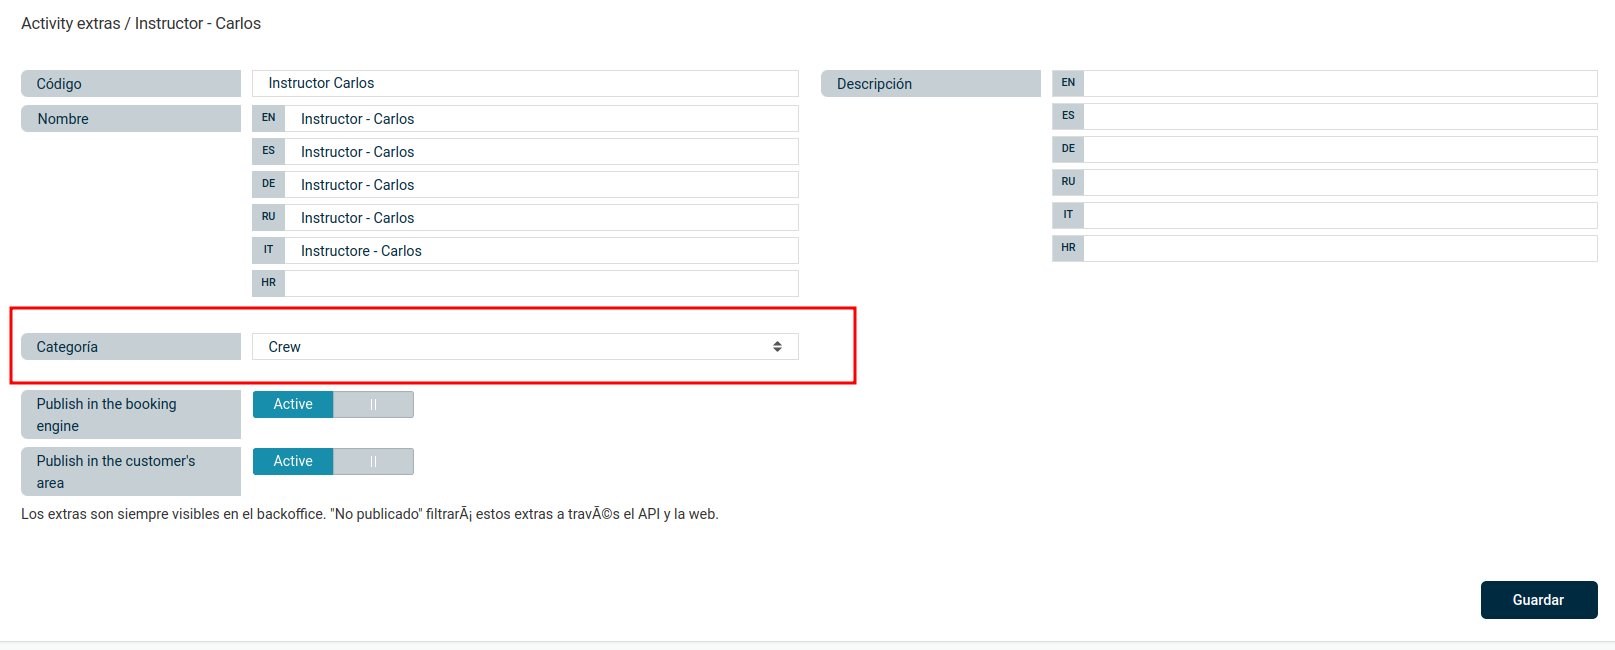
For step 2, go to either of the following two options:
In both cases you will find the Category field, with a drop-down selector of the categories created in step 1.

Finally, you can add your extras to your ships or activities. If you want to reinforce how to do this step we link you to their tutorials:
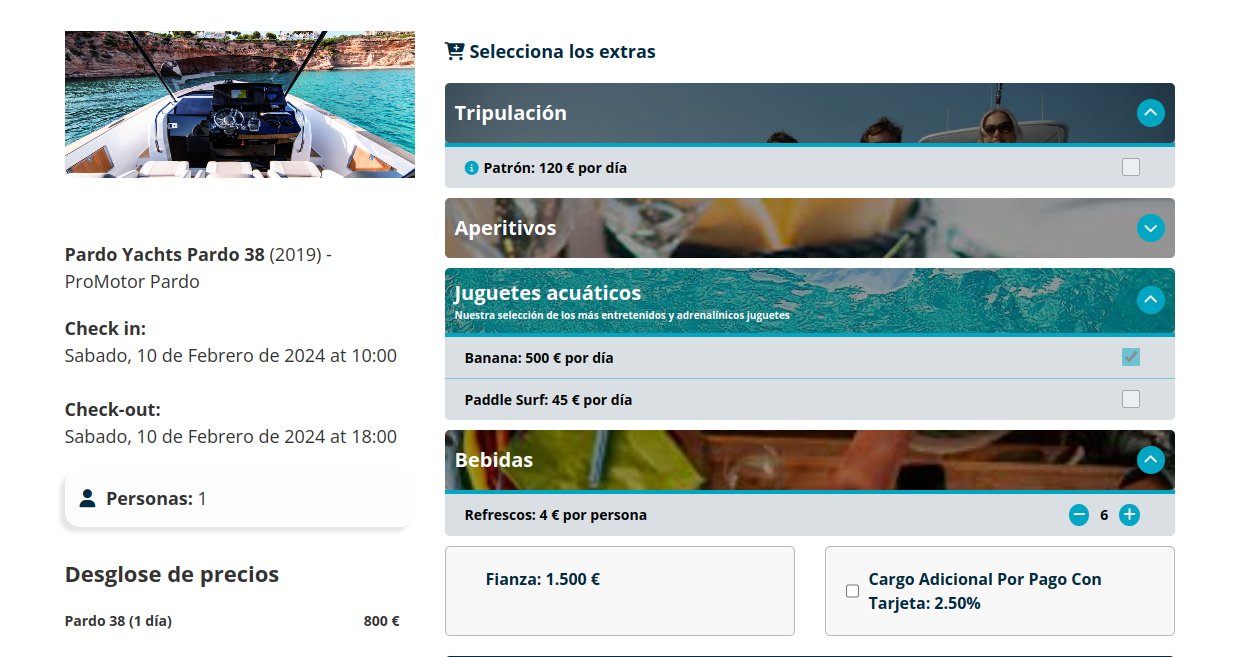
Now you can go to your website and check that everything looks the way you want it to.

CONTACT US